谷歌AMP如何通过验证正是上线?AMP如何在移动端显示闪电图标?相信很多人都不太清楚吧,虽然MIP闪电图标有这么一段历史,但是都过去了,不过AMP还在,想要做好外贸等关于有关国外的一些网站,做AMP是一个很不错的选择。77生活网小编今天就来与大家一起了解一下这个Google AMP。
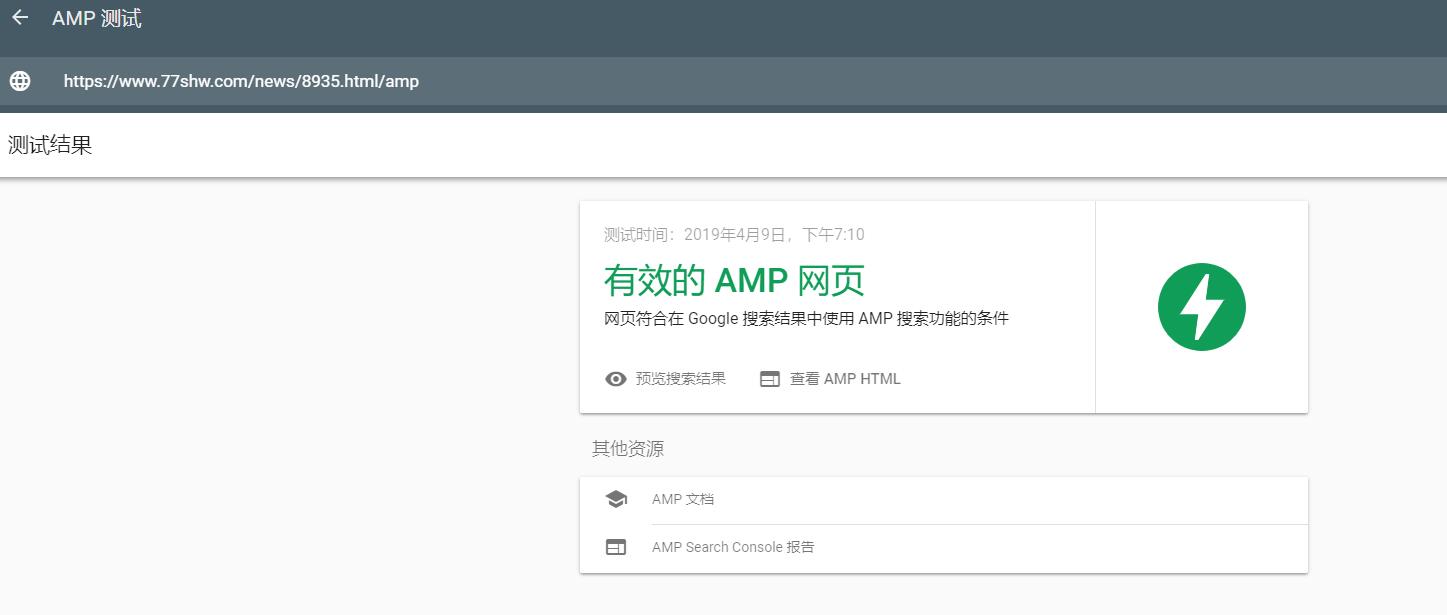
AMP检测地址:https://search.google.com/test/amp?url=自己的amp地址
什么是 AMP?
AMP 是一种构建网页快速呈现的静态内容的方式。实际应用的 AMP 包括以下三个不同的部分:
- AMP HTML 是为确保可靠性能而具有某些限制的 HTML,它进行了一些扩展,可以构建超出基本 HTML 的丰富内容。
- AMP JS 库可确保快速呈现 AMP HTML 网页。
- Google AMP Cache 可用于提供经过缓存的 AMP HTML 网页。
AMP HTML例子:
AMP HTML 本质上是使用自定义 AMP 属性扩展的 HTML。最简单的 AMP HTML 文件如下所示:
<!doctype html>
<html ⚡>
 <head>
   <meta charset="utf-8">
   <link rel="canonical" href="hello-world.html">
   <meta name="viewport" content="width=device-width,minimum-scale=1,initial-scale=1">
   <style amp-boilerplate>body{-webkit-animation:-amp-start 8s steps(1,end) 0s 1 normal both;-moz-animation:-amp-start 8s steps(1,end) 0s 1 normal both;-ms-animation:-amp-start 8s steps(1,end) 0s 1 normal both;animation:-amp-start 8s steps(1,end) 0s 1 normal both}@-webkit-keyframes -amp-start{from{visibility:hidden}to{visibility:visible}}@-moz-keyframes -amp-start{from{visibility:hidden}to{visibility:visible}}@-ms-keyframes -amp-start{from{visibility:hidden}to{visibility:visible}}@-o-keyframes -amp-start{from{visibility:hidden}to{visibility:visible}}@keyframes -amp-start{from{visibility:hidden}to{visibility:visible}}</style><noscript><style amp-boilerplate>body{-webkit-animation:none;-moz-animation:none;-ms-animation:none;animation:none}</style></noscript>
   <script async src="https://cdn.ampproject.org/v0.js"></script>
 </head>
 <body>Hello World!</body>
</html>
虽然 AMP HTML 网页中的大多数代码都是普通的 HTML 代码,但是有些 HTML 代码已被替换成了 AMP 特定代码(另请参阅 谷歌AMP 规范中的 HTML 代码)这里就不多说了。利用这些自定义元素(称为 AMP HTML 组件),可以轻松高效地实现常见的模式。
谷歌AMP如何通过验证正是上线?查看AMP状态报告做好修改,这与百度的MIP是一个道理,做了这些页面也需要验证合格才会生效,比如开始的mip闪电图标,其实AMP也是有闪电图标的,只要正式在移动端生效就会出现。如下图检测之后的预览效果: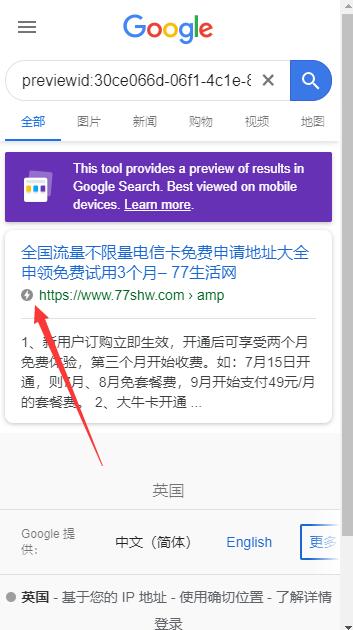
什么是AMP状态报告?
该报告可帮助您修正具有以下影响的错误:会导致您的 AMP 网页无法使用 AMP 专用功能显示在 Google 搜索结果中。顶级视图会显示 Google 在您网站上发现的所有包含问题的 AMP 网页,并会按问题分组显示这些网页。点击某个具体问题可查看问题详情,其中包括受该问题影响的网页的示例列表、与如何修正该问题有关的信息,以及用于将您做出的修正告知 Google 的流程。
只要查看报告做好对应性的修改就可以了。小编是使用的后台搜索的一看AMP插件,也是谷歌推荐的一款,名字叫做AMP,搜索就出来了如下图:
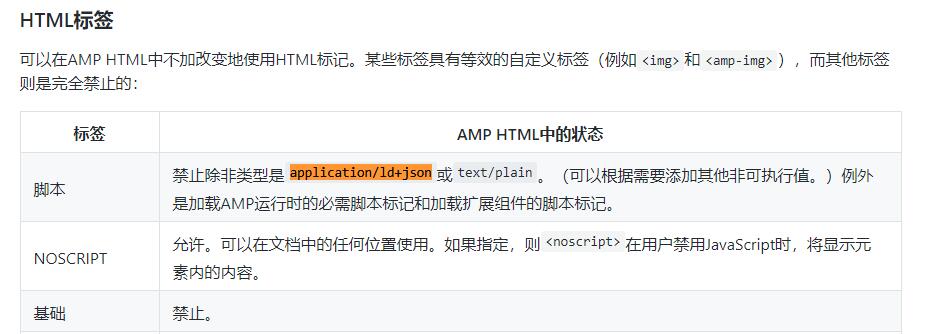
出现的问题就是使用之后,并不能直接的通过验证,有一个地方是需要注意的,那就是application/ld+json,官方也有说明是必须的,而插件自带的并不能如愿,所以小编做了修改之后一切都通过了。
找到AMP插件目录文件includes/amp-helper-functions.php修改为如下:
<script type="application/ld+json">
{
  "@context": "https://schema.org",
  "@type": "NewsArticle",
  "mainEntityOfPage": {
    "@type": "WebPage",
    "@id": "<?php the_permalink();?>/amp"
  },
  "headline": "<?php echo trim(wp_title('',0)); ?>",
  "image": ["<?php the_post_thumbnail(); ?>"],
  "datePublished": "<?php echo get_the_time('Y-m-d\TH:i:s');?>",
  "dateModified": "<?php echo get_the_time('Y-m-d\TH:i:s');?>,
  "author": "77生活网",
  "publisher":"77生活网",
}
</script>
就简单的说到这里了,还有不懂的也可以留言或者看看官方文档。https://github.com/ampproject/amphtml/blob/master/spec/amp-html-format.md
这里是旧版的谷歌Search Console(点进去切换新版即可查看自己的报告):https://www.google.com/webmasters/tools/dashboard
AMP文档地址:https://amp.dev/documentation/guides-and-tutorials/








评论